In this post, we will guide you how to run a forward test on the TrueFX live feed (WebAPI). We have separate instructions on how to test on a live feed from your MT4 client terminal, how to back test on historical prices and how to copy trades from the TrueFX live feed (WebAPI) to your MT4 client terminal.
We assume you have the Day Trading Tester Suite installed. If you don’t yet have the software, you can get it here.
After you started the software, you need to perform 4 steps.
Step 1. Select the live data source
To use the TrueFX live feed, on the Toolbar, click the Online button. Then, from the drop-down list, select the currency pair you want to test on.

Note that for some currency pairs, you might be asked to change the account currency. This is a restriction of the TrueFX WebAPI that we use – where only 10 currency pairs are supported.
Step 2. Define the automated trading strategy
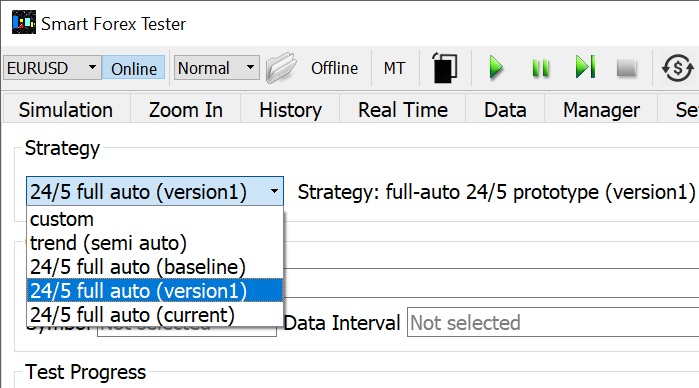
Go to the Tester tab and from the Strategy drop-down list, select one of pre-defined strategies that you want to run the test with. We suggest selecting version1 which is the latest as of this writing. See the Advanced section below on how to test your own strategy.
Now, set the desired strategy parameters. For that, open the Automated Trader GUI by clicking the $ button on the Toolbar.
You can configure StopLoss (SL), TakeProfit (TP) and MaxSpread. After you change a value in the control, it stays highlighted until you click the corresponding Set button to make the change saved in the software.
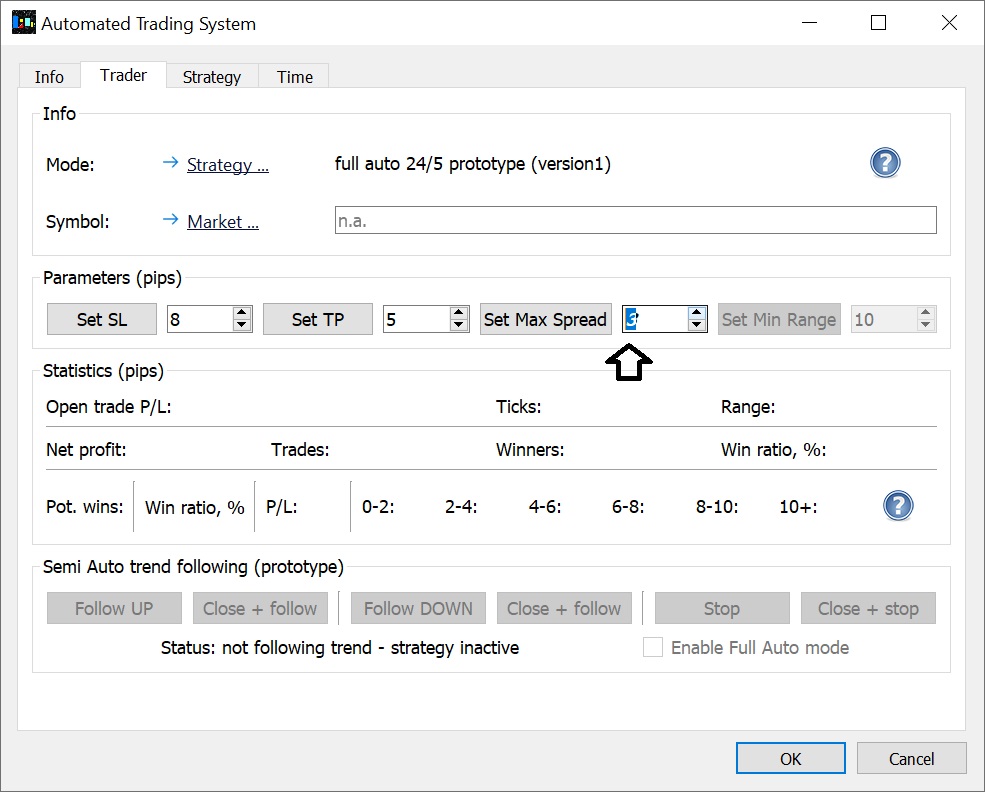
Note that you can change the values during runtime as well. The changes are instant – except if you have an active trade. Then the new values will be in effect from the next trade.
While SL is static, TP is not in the version1 strategy. Once current profit exceeds the set value, the strategy moves the SL level to the breakeven and starts trailing – but slower than the profit grows.
The MaxSpread parameter forbids entering the markets if the current spread exceeds the set value.
You may want to use the parameters from our continuous GBPUSD forward test – after all, it has won over 5,000 pips since October 2020. We used TP=5, SL=8, MaxSpread=2 pips.
Step 3. Define the Pivot Point Analyzer (PPA) parameters
If you are new to the PPA, we suggest starting with the same values we used in the continuous test mentioned above.
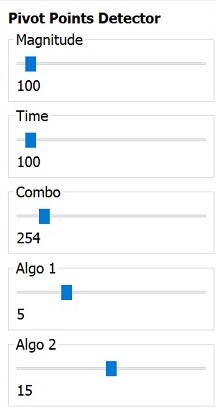
To set the parameters, go to the Analyzer tab, and set the values by moving the sliders with the mouse then fine tuning with the arrow keys.
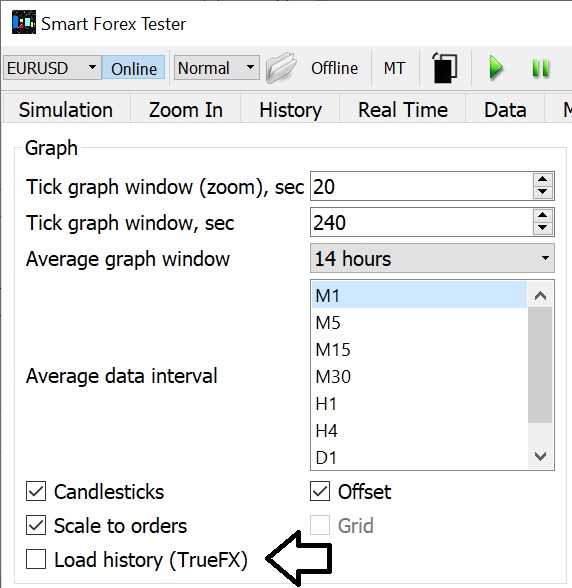
Step 4. Configure price history download
The Suite stores about 3,000 ticks of price history for every currency pair supported by the TrueFX Web API. If you want to have the history downloaded before you start a simulation, go to the Settings tab, and check the Load history (TrueFX) box.
While having some history is convenient, if you want to save the ticks after the test and use them to back test some strategy modifications, we suggest you disable the history download.
The reason is that only without history the offline results will be 100% matching that from the live test. The Suite doesn’t save the history ticks.
Now, you are all set! Just click the green Play button on the Toolbar to start the simulation.
Restarting the test
If you want to run a simulation for some other currency pair, you need to stop the current simulation first. Use the green Stop button on the Toolbar.
Time Shifting
When the simulation is running, you can activate the Time shifting function by pressing the red Record button on the Toolbar. The test will be paused but the Suite will continue recording the incoming ticks; to resume the test, click the blue Resume button.
Saving live feed ticks
At any time, even with a test running, you can save the ticks from the beginning of the test up to the current moment. Click the Save ticks… button on the Real time tab and specify the file name. Ticks are saved as a .csv file, you can edit it with any text editor.
Saving the trade log
Your trades will be shown in the table on the History tab. At any time, you can save the snapshot in the file. Click the Save trades… button on the Tester tab and specify the file name. Trades are saved as a .csv file, you can edit it with any text editor.
NOTE: you may need to adjust the time format in Excel to view the time stamps of the trades with maximum accuracy.
Advanced
If you want to test your own strategy, you need to select custom in the Step 2. This assumes your strategy is ready. Read the step-by-step instructions how to prepare your strategy.